
部署OpenClaw
部署OpenClaw
Drift1ng一、创建一个github的内部服务器
使用github进行部署,先要进行创建一个云端环境,访问https://github.com/codespaces
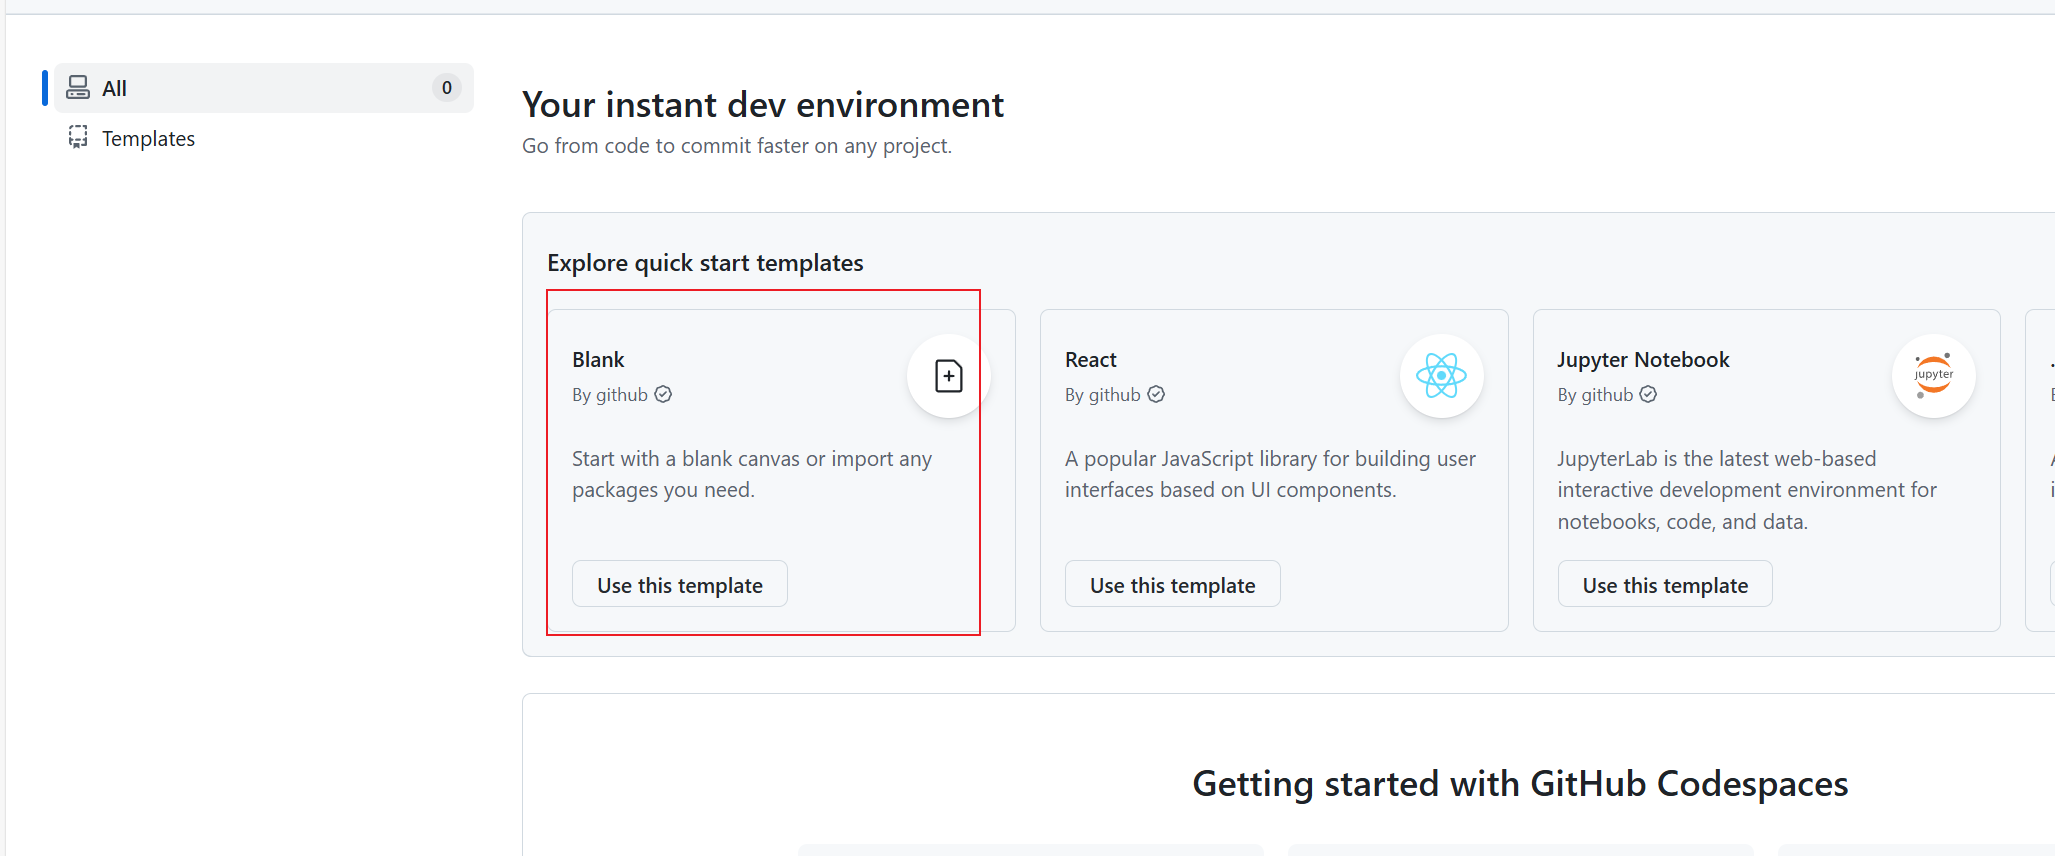
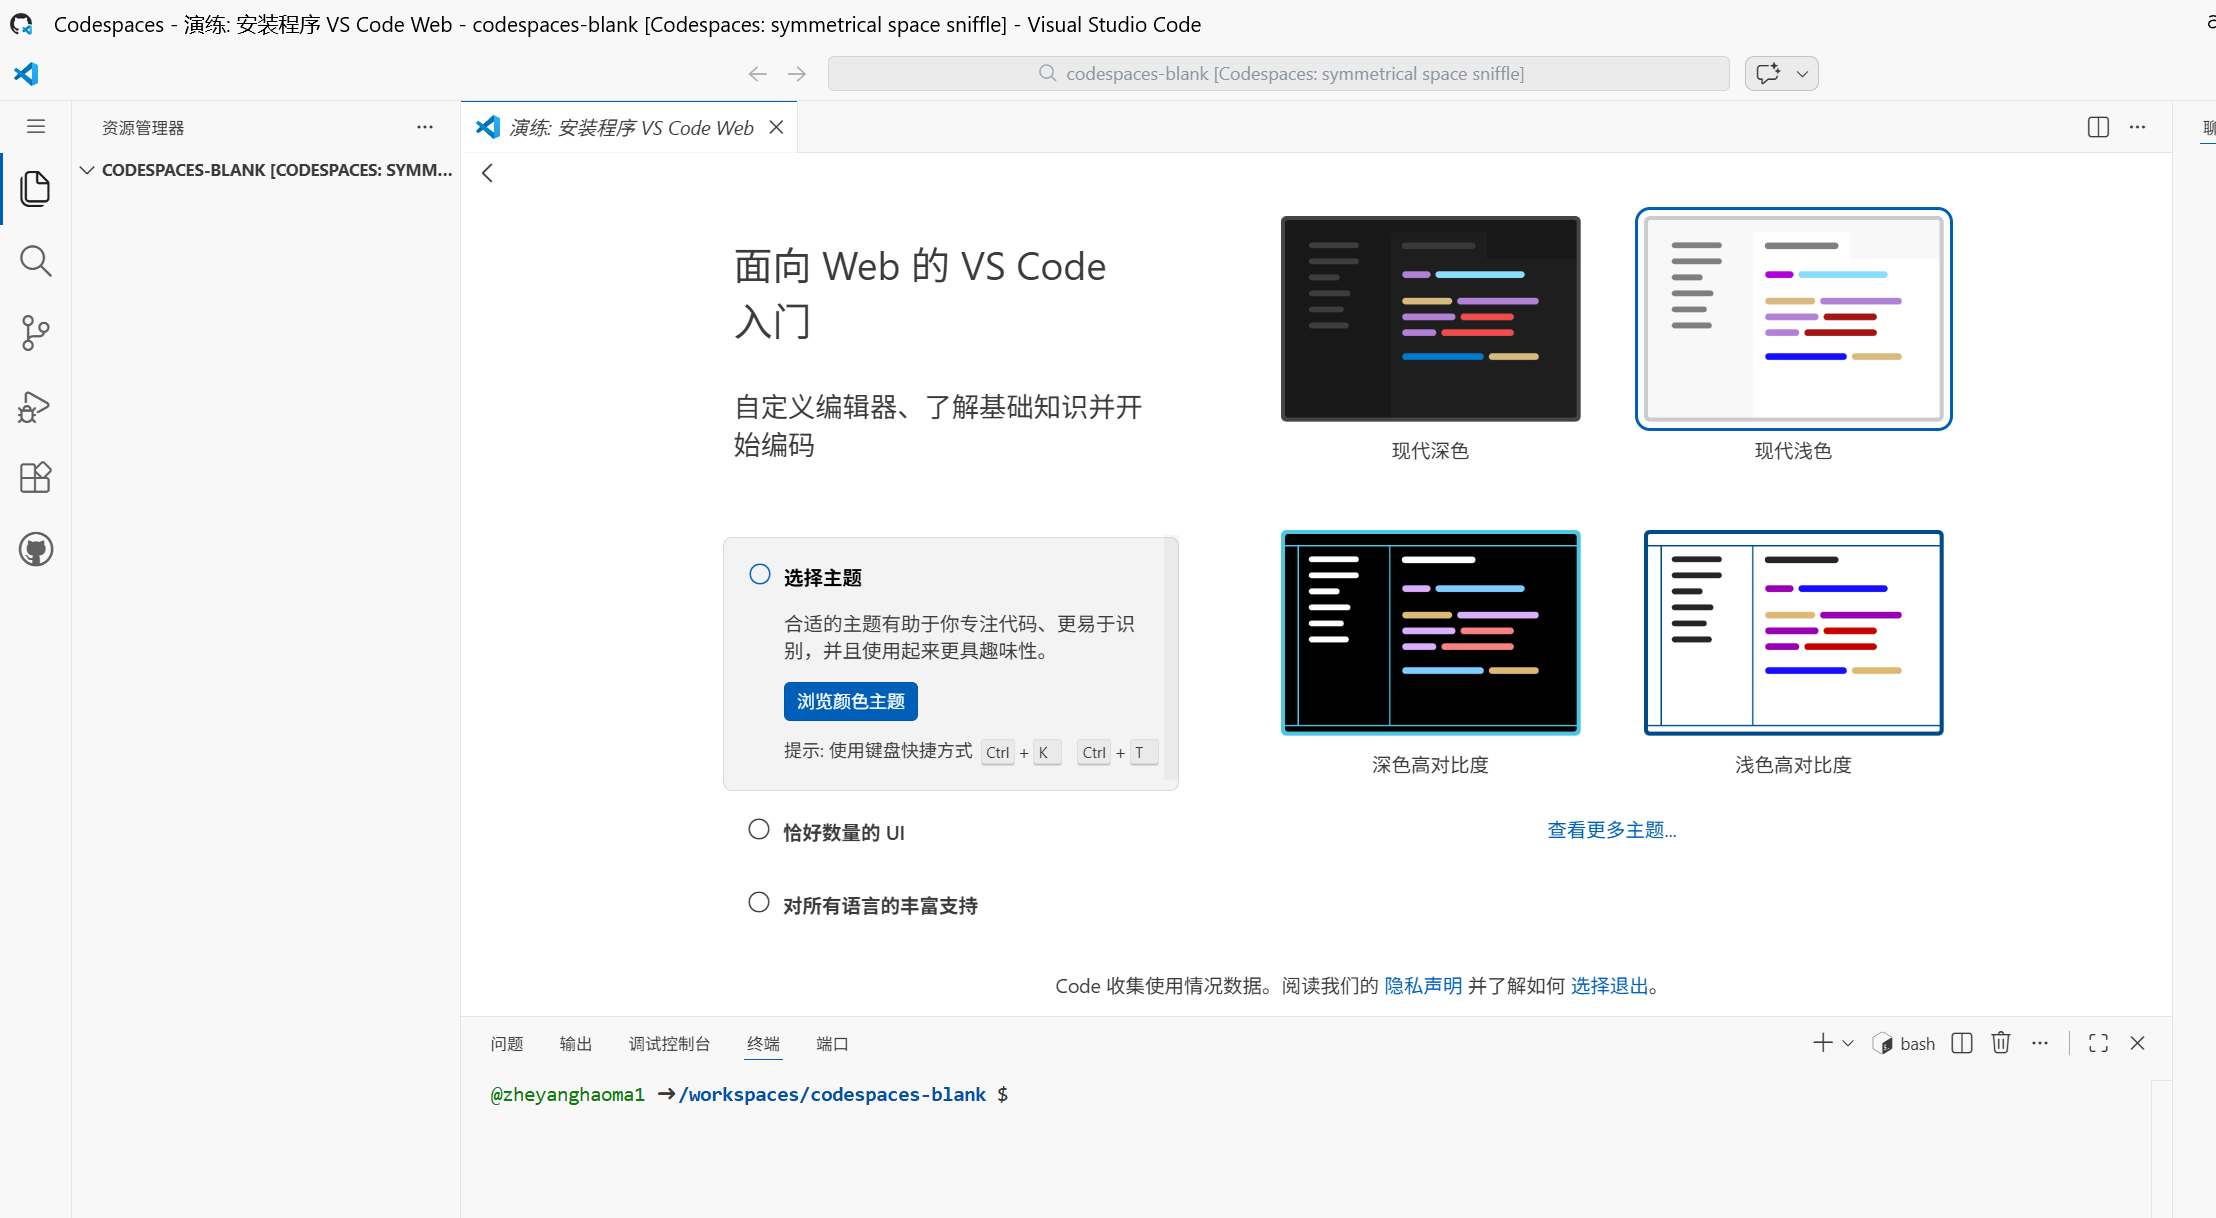
选择第一个可以进入到下面这个界面
接着输入去官网上查找安装的指令吗,因为github上的系统是Linux所以执行下述命令
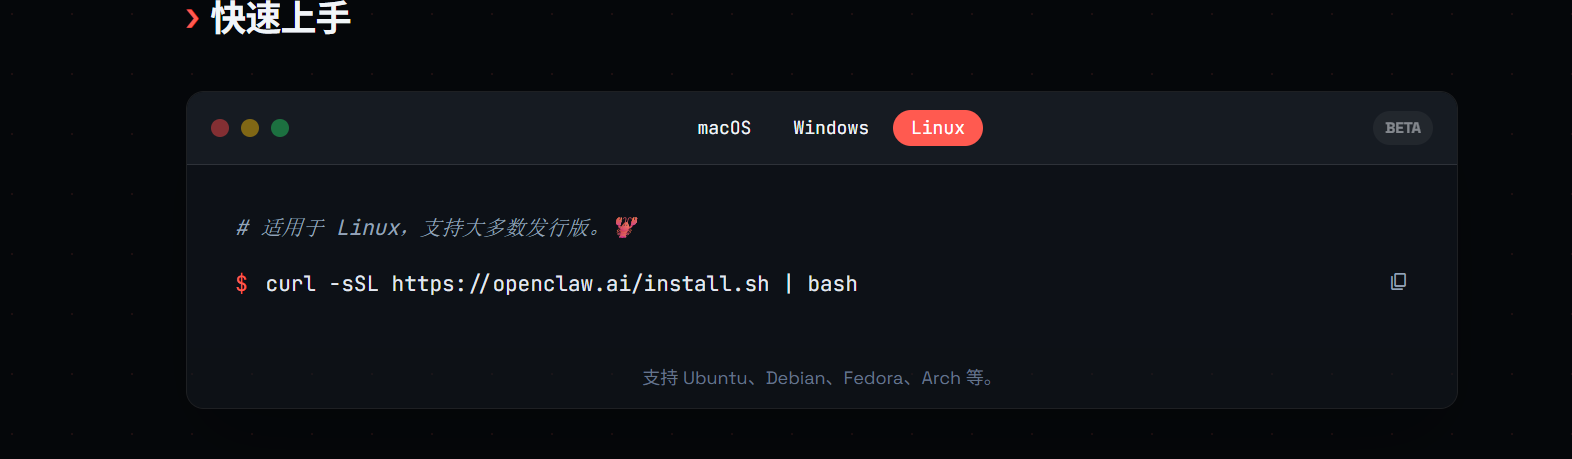
1 | curl -sSL https://openclaw.ai/install.sh | bash |
接着就是安装
二、飞书转纸飞机
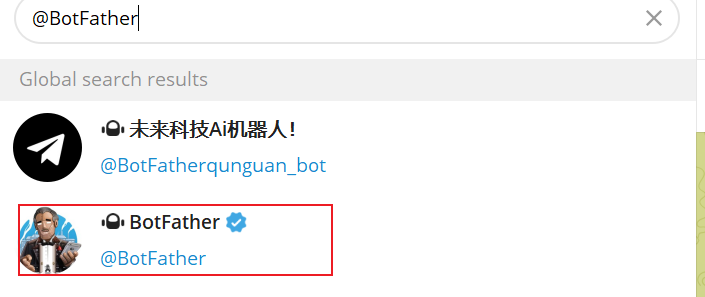
创建机器人
上纸飞机搜索官方的机器人
接着发送
1 | /newbot |
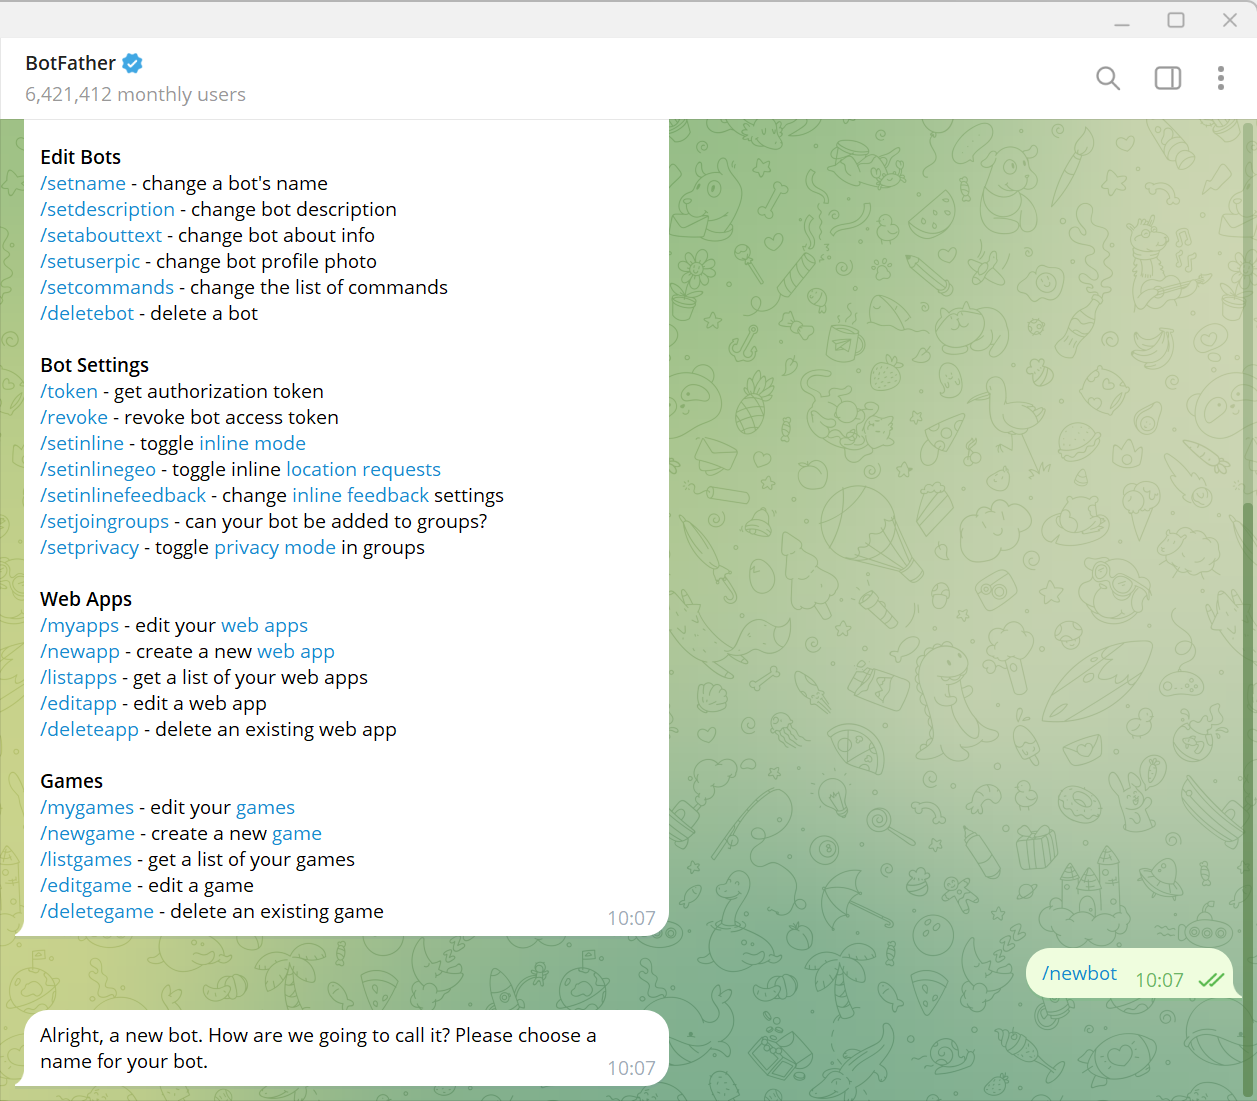
接着就是起名
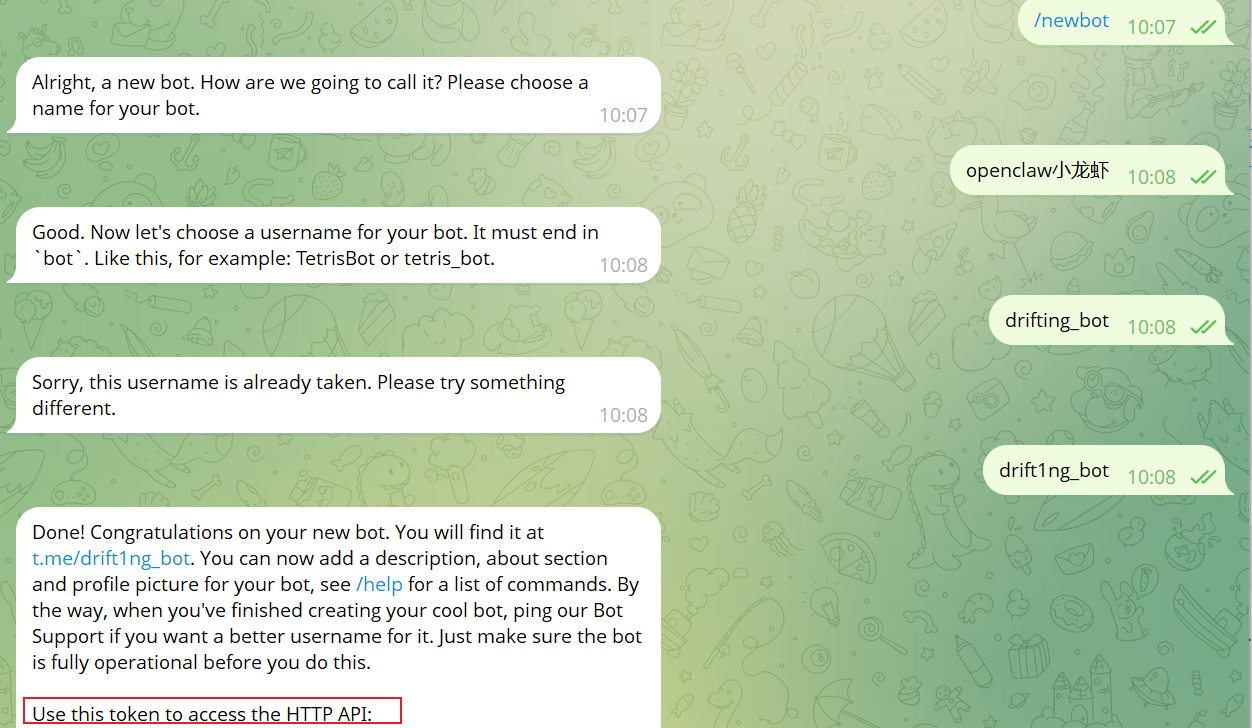
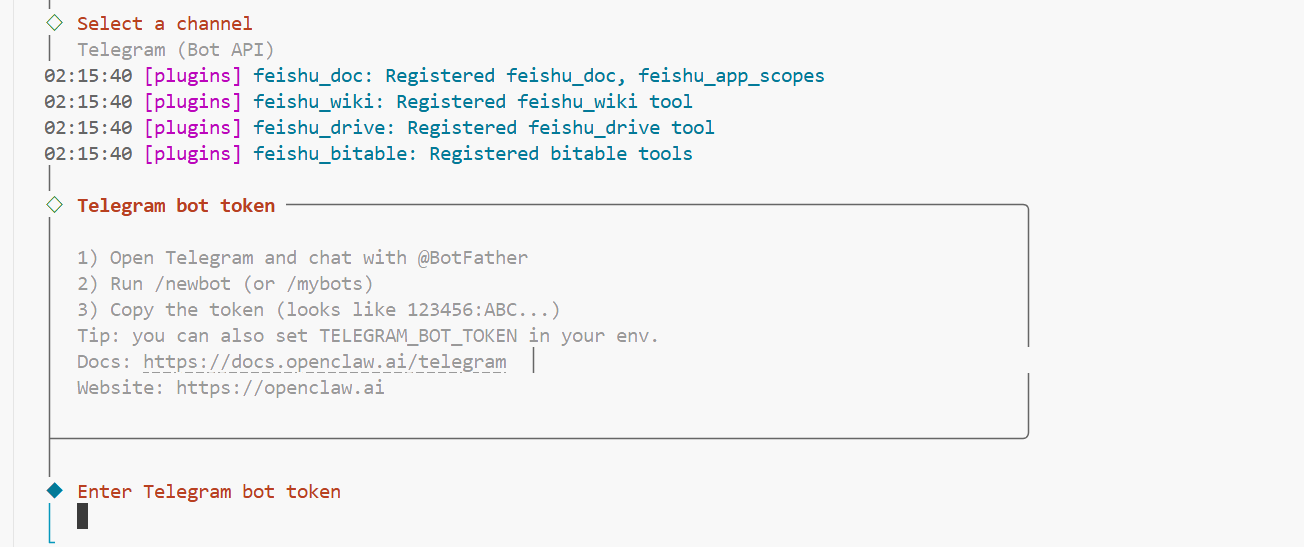
这样就创建成功了并得到了bot token就是这个api
openclaw修改配置
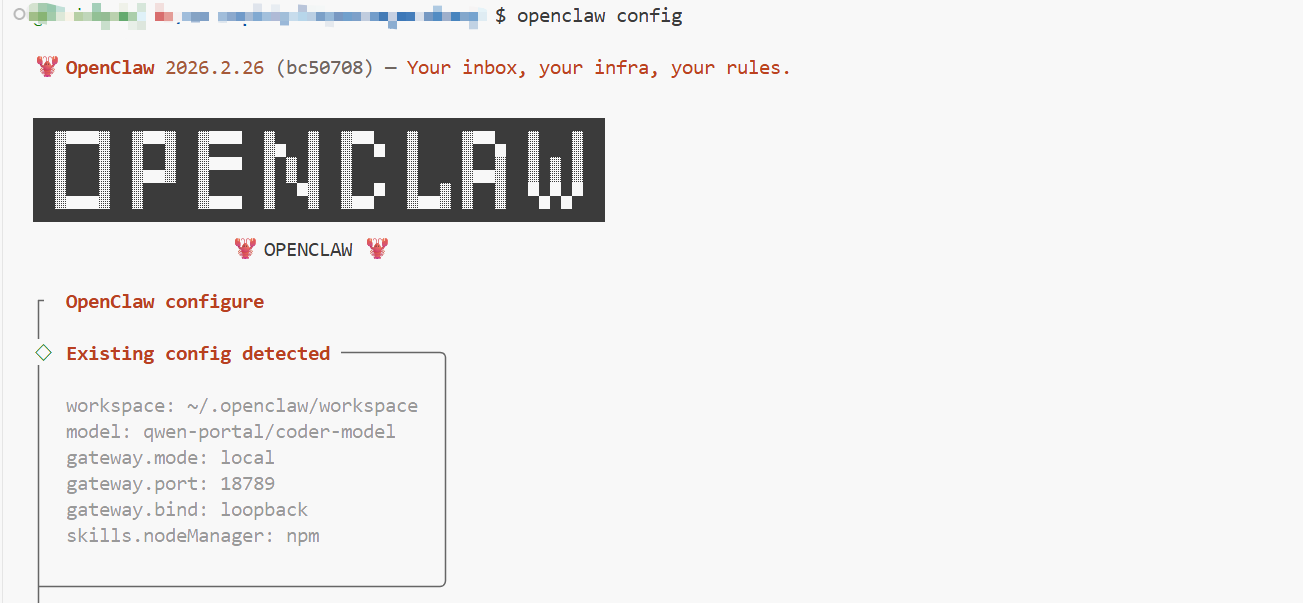
输入
1 | openclaw config |
接着按照下面这个选择
1 | ◇ Where will the Gateway run? |
选择第一个就可以了接着输入api
输入完基本就弄好了,后面的选择如下
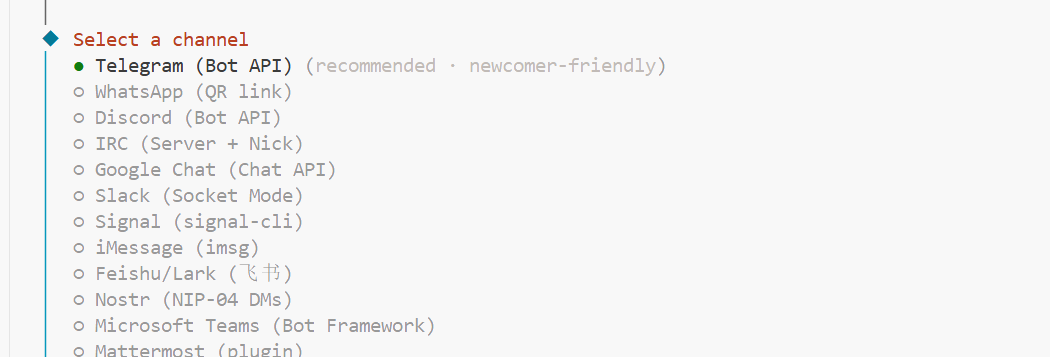
1 | ◇ Select a channel |
接着在纸飞机上输入刚刚创建的机器人的名字

开始使用这个机器人的时候和飞书上一样是要先进行配对

这个/start之后就会出现这个配对码,接着回到终端去执行给的命令完成配对
1 | openclaw pairing approve telegram xxxxx(配对码) |
这样就结束了

三、遇到的问题
openclaw的控制台打开不了
我去问ai告诉我的是去找setting,但是我一直没用看到这个设置在那,后面才发现这个设置就是概览这里

就是将这个网关的问题修改一下成正确的值就好,这里我是进行设置了密码,步骤如下:
1 | openclaw config |
接着
1 | ◆ Where will the Gateway run? |
设备配对批准问题 (pairing required)
出现这个问题的时候问了几次ai一直没给出最有用的解决方法,最后是将启动openclaw的控制台的信息一起丢给ai就给了解决方案
第一步:列出等待批准的设备 在终端里输入并回车:
1 | openclaw devices list |
预期结果:你会看到一个列表,里面有一个状态是 pending(等待中)的请求,旁边会有一串字符,那就是它的 requestId。
第二步:批准它! 复制上面那串 requestId,然后执行(把 <把ID粘贴在这里> 替换成你实际复制的代码):
1 | openclaw devices approve <把ID粘贴在这里> |
预期结果:终端会提示类似于 Approved device... 的成功信息。这就相当于你作为主人,亲自给这台浏览器发了通行证。这样刷新页面就可以进入到控制台中。
怎么将这个机器人在后台一直运行
我们可以写一个极小的脚本,每隔 20 分钟模拟一次操作,欺骗 GitHub 认为你还“在线”。
在终端里创建一个脚本文件:
1
vi keep_alive.sh
把下面这段代码粘贴进去:
1
2
3
4
5
6
7
8
9
echo "Keep-alive script started. Press Ctrl+C to stop (if running in foreground)."
while true; do
echo "Heartbeat at $(date)"
# 产生一点内部网络流量
curl -s http://localhost:18789 > /dev/null
# 每 1500 秒(25 分钟)跳动一次
sleep 1500
doneesc接着输入:wq!保存退出
现在,我们要让“网关”和“唤醒脚本”同时在后台起飞:
启动网关:
1
openclaw gateway start
启动唤醒脚本(使用 nohup 挂载):
Bash
1
nohup ./keep_alive.sh > /tmp/keep_alive.log 2>&1 &
怎么检查它们都在跑?
你可以输入以下命令来“查岗”:
- 看网关日志(看飞书消息):
openclaw gateway log - 看唤醒脚本日志(看心跳):
tail -f /tmp/keep_alive.log